Wednesday, January 30, 2008

Vista Fast Shutdown

vista Here's a neat one I fell over somewhere on the web:
Open Regedit (WINDOWS KEY + R on your keyboard, or by clicking Start and typing on the search bar "regedit" without quotes. Hit Enter

Navigate to [HKEY_LOCAL_MACHINE\SYSTEM\CurrentControlSet\Contro l] On the right panel look for the "WaitToKillServiceTimeout" string and change it value to 1000 by right clicking the string and selecting Modify...

Default Value WaitToKillServiceTimeout=20000

Modified value WaitToKillServiceTimeout=5000
Modified value WaitToKillServiceTimeout=1000 (extreme, use it at your own risk)


I found 3000 worked nicely but try the 5000 first. 3000 does sometimes leave some programs lagging which then need a further key click.

Disable Welcome Center

vista tutorialsAs soon as you install Windows Vista you are bombarded by the Welcome Center that is designed to help beginner Windows users easily configure their new computer. This new welcome screen is a nice feature the first time you start using Windows vista but quickly becomes annoying.

Disabling the Welcome Center is very easy to do and can speed up your boot as well.

1. Start Regedit.

2. Navigate through HKEY_CURRENT_USER, Software, Microsoft, Windows, CurrentVersion, Run.

3. Right click on the WindowsWelcomeCenter key and select Delete.

The next time you restart the Welcome Center will be gone.

Six Quick Vista Tricks

Work Vista like a pro with these shortcuts and secrets.

vista_quick_shorcutDual-boot the right way. Installing Windows Vista in a dual-boot configuration with Windows XP is a great way to test the new operating system while still retaining the comfort and compatibility of the old one. But if you install Vista from within XP, the new OS is installed on a new partition with a new drive letter, typically D:. A better idea is to create a dual-boot setup by booting the PC with the Vista DVD and installing at that point. This way, both Vista and XP—whichever one you're running at the time—will appear to be on C:, not D:. Applications that automatically default to C: will run without confusion, and any you install while using Vista will show up on your primary partition.

vista_quick_shorcutGet network drivers that work. Micro­soft tested more than 100 XP-era hardware drivers that work fine in Vista but that are not included with the operating system for various reasons. Most affected are Ethernet cards and Wi-Fi adapters. If one of these devices doesn't work after you've installed Vista, it more than likely will if you download the XP driver from the manufacturer's site. Microsoft engineers prepared a list of drivers they found to be compatible with Vista, but the document was never posted. We've posted the list ourselves at ­WindowsSecrets.com/vista.

vista_quick_shorcutEdit TV shows and skip commercials. Only the Vista edition of Windows Movie Maker lets you edit Media ­Cen­ter-recorded TV shows. That means you can edit out the commercials (although you're limited to ­standard-definition television content). You can also archive your favorite shows in WMV (Windows Media Video) format, which creates much smaller files than Media Center's MS-DVR format.

vista_quick_shorcutUse Virtual Folders. Vista's new Virtual Folders feature has been downplayed to the point that it's almost invisible in the user interface. But it's still there and highly usable. Look for prebuilt examples in C:\Users\username\Searches. In a search window (Windows-F) click Save Search to create a search folder, such as "documents by Jack that mention the Nexus project." Your folder dynami­cally updates its view to include any such file that's added, changed, or removed.

vista_quick_shorcutKeep malware at bay. To get better ­security defenses than are possible in XP, leave Vista's User Account Protection enabled and select a Standard User account. You must enter an admin password occasionally, but it's worth the trouble in the interest of keeping Trojan horses and other malware from silently infecting your system. For even better security, apply Parental Controls to your Standard User account, even though you're an adult. Power users do this to get a pop-up reminder when they're about to visit a suspect Web site or run a rogue application.

vista_quick_shorcutGet the best 3D rendering. The new OS includes striking 3D effects. But you won't get the best rendering in, say, Vista's new chess game unless you know the trick. Click Game, then Options, and push the Graphic Quality slider all the way to the right. When you click OK, you'll notice the game instantly becomes smoother and less jagged-looking. To get the opposite effect, push the slider all the way to the left. The game then downshifts to a 2D mode that's just right for older PCs.

Top 10 Tweaks, Tips and Tricks for Windows Vista

VistaMicrosoft have created a very handy site for the upcoming Windows Vista (see link at bottom). It has lots of tips for getting the best out of Vista.

1. If you’re annoyed by Internet Explorer’s incessant barking that you’ve lowered your security settings (like, if you’re a non-paranoid expert), launch “gpedit.msc” from either the Run command or Start Search field, navigate through Local Computer Policy / Computer Configuration / Administrative Templates / Windows Components / Internet Explorer. In the rightmost pane, double-click “Turn off the Security Settings Check feature” and set it to Enabled.

2. If Internet Explorer’s Information Bar also annoys you, you can turn it off (again) in the Group Policy Object Editor (gpedit.msc) through Local Computer Policy / Computer Configuration / Administrative Templates / Windows Components / Internet Explorer / Security Features. In the rightmost pane, double-click “Internet Explorer Processes” and set it to Disabled. Hallelujah!

3. I’ve just mentioned two tweaks that are buried inside the Group Policy Editor. Jim Allchin pointed out that there’s a Group Policy Settings Reference spreadsheet available. Makes for great weekend reading.

4. Read the Background on Backgrounds if you’re a performance junkie. Don’t set your wallpaper through Internet Explorer ever again! Now that Windows supports JPG wallpapers, there’s absolutely no need (or excuse) for using BMPs anymore.

5. If you insist on keeping UAC (User Account Control) turned on for yourself, you might care to make the elevation prompts a bit less visually jarring. Brandon told me about this one, even though I have UAC turned off. Launch the Local Security Policy manager (secpol.msc), and navigate through Security Settings / Local Policies / Security Options. In the rightmost pane, scroll to the bottom and double-click “User Account Control: Switch to the secure desktop when prompting for elevation.” Disable it, and you can keep UAC turned on without getting turned off by the embarrassingly craptacular Aero Basic theme.

6. Vista can send you emails! The Computer Management tool can still be accessed by right-clicking “Computer” and selecting “Manage” from the menu. However, now you can attach a task to any event. Try navigating through System Tools / Event Viewer / Windows Logs / Application. Now, go ahead and select an event - then look to the rightmost pane and click “Attach Task to This Event.” Name it whatever, describe it however, click through the next step, then in the Action step, you’ll see the “Send an e-mail” option.

7. The Windows Task Manager gives you a lot more troubleshooting information in Vista. Flip to the Processes tab, and in the View menu, click “Select Columns” and add Description, Command Line, and Image Path Name. Moreover, when you right-click a process, you can select either “Go to Service(s)” or “Open File Location.” These are all long overdue options.

8. This one’s interesting. Open up the Date and Time Control Panel applet. Flip to the “Additional Clocks” tab. There, you can configure two more clocks from different time zones. They’ll appear in the tooltip when you hover over the Taskbar clock. No additional software (or silly sidebar widgets) necessary.

9. Applicable in other versions of Windows, I’m going to throw it in here for good measure. Create a shortcut to RegSvr32.exe in your SendTo folder. To get there quickly, enter “shell:sendto” in the Run command dialog or Start Search field. Now, when you wanna register a DLL or OCX file with the system, you can select it/them and “Send To” the RegSvr32 shortcut.

10. I figured I’d round out my first set of Windows Vista tips and tricks with a tiny bit of eye candy. It doesn’t beat Picasa, but the Windows Photo Gallery is better than nothing. Once it’s indexed all your photos, click the icon next to the Search field and turn on the “Table of Contents.” That’s kinda nifty.

Tuesday, January 29, 2008

Lock Your PC with a USB Drive

Lock USBNow here’s a nifty one for PC security. So you lug around a thumb drive as a handy backup for your data, store some no-install software for quick use, and a means for your to transfer or copy data on the fly. Who thought you can use it as your personal PC keyfob?

Here’s USB PC Lock Pro that does exactly just that - convert your USB key into your own personal PC keyfob. What it can do is to automatically lock your PC as soon as you unplug the USB drive. It can also do a number of fancy things via plug-ins like locking your MSN Messenger, stop streaming media, and mute your speakers.

Just take note that you need to install this on the PC that you need secure and not on the USB drive. It’s free for download and use and works with most (if not all) USB drives.

Download USB PC Lock Pro here.

Via CyberNet News

Make your IE works fast like Firefox

make ie fasterI think many people are using firefox while microsoft internet explore (latest vesion is IE7 for free) that useful. Why ?
The resion i think firefox faster ie. And this tutorial i help you make your ie fast like firefox.

1. click start > run
2. type regedit > enter
3. browse folder HKEY_CURRENT_USER\Software\m*cro$oft\Windows\Curre ntVersion\InternetSettings
4. right click @ windows right > New > DWORD
5. type MaxConnectionsPerServer > u can set value (the more higher the no, the more good speed u get, eg : 99)
6. create another DWORD >type MaxConnectionsPer1_0Server
7. then put a high value as mentioned above
8. then, restart IE ... ur finished.

Remove Recycle Bin from the Desktop

Remove Recycle BinIf you don't use the Recycle Bin to store deleted files , you can get rid of its desktop icon all together.

Run Regedit and go to:

HKEY_LOCAL_MACHINE/SOFTWARE/ Microsoft/Windows/CurrentVersion/explorer/Desktop/NameSpace

Click on the "Recycle Bin" string in the right hand pane. Hit Del, and tha click OK.

Speed Up SATA Hard Drives in Windows Vista

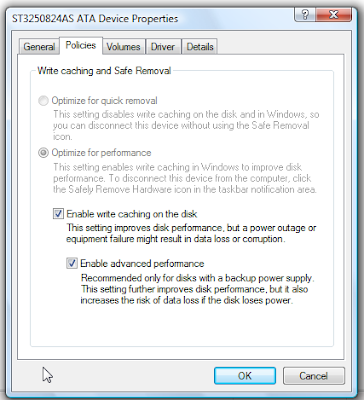
Windows Vista has built-in support for Serial ATA(SATA) hard drives, but it doesn’t automatically enable advanced write caching features. You can speed up your computer by enabling this mode in Device Manager.

You can quickly get to Device Manager by just typing device into the start menu search box. (Or from the command line, devmgmt.msc)

Open the Disk drives section of the tree, and right-click on your hard drive. Select the Policies tab, and you should see this dialog:Vista tutorialsClick the checkbox for Enable advanced performance, and you are done.

FlickrDown - A Flickr Mass Downloader

FlickrDown
Flickr is the most popular image hosting site because it hosts your images without any cost for bandwidth or storage.

Uploading photos to Flickr is easy, you can find many uploading tools, but to download photos you need to get it one by one. Flickr doesn't provide facility like Google’s Picasa Web Albums, it gives a link through which user can download whole image set or album.

FlickrDown is a small and freeware utility which let you download images from any Flickr user direct to your Computer. You can download photos by specifying Flickr a Username, email address, tag or group name and start the search. The search will reveal all thumbnails of the images that were found and you can either check the ones that you would like to download or check the search term so that all pictures are downloaded to your computer.

FlickrDown is only for Windows users and requires Microsoft .Net Framework 2.0
[via ghacks]

Thursday, January 24, 2008

How to Embed YouTube in Winamp

I found this trick Embedding YouTube in Winamp on Life Hacker. You will like it.

Winamp
A reader of Lifehacker Justin writes

To add YouTube to Winamp, close Winamp and add the following lines to the bottom of the ml_online.ini configuration settings file (C:\Program Files\Winamp\ Plugins\ml\ml_online.ini):

ElementId11=8000
ElementIcon11=11002
ElementSubbed11=1
ElementName11=Youtube
ElementURL11=http://youtube.com/?cmd=mini

You should also remove this line: ElementID10=-1, save the file, and restart Winamp. When you do, YouTube should be embedded in your Online Services options.

[Via Life Hacker]

How to Rename Start Button in XP

You can rename your Windows XP 'start' button through registry or explorer.exe by changing some values. But there is lots of efforts to rename 'start' button through it.

There is a new and simple way to do that without playing with registry or explorer.exe.

A utility called StartBtn Renamer will do it for you. start buttonjust download the utility, type the text( you want to give to the start button) in New Lable section and click on 'Rename It!'.

Your 'start' button text has been changed.

Wednesday, January 23, 2008

How to Hide/Un-Hide Recycle Bin Icon on Desktop in XP

Recycle BinIn this post you will learn How to Hide or Un-Hide the Recycle Bin Icon in Windows XP. Many people hate this icon, I don't know why, they just don't want to let it appear on their Desktop.

I am explaining two ways from which you can Hide the Recycle Bin Icon and whenever you need it, you can Un-Hide it.

1) This is the simple way as compare to second one.

From Group Policy Editor we will Hide the Recycle Bin Icon.

  • Click Start, Click Run, Type GPEDIT.MSC, Press Enter
  • On the Left Column Expand Administrative Templates, click on Desktop
  • On the Right Column Find Remove Recycle Bin Icon from Desktop
  • Double click on it, A Property Window will Appear
  • Select Enable option, Press OK.
  • Refresh Desktop, Enjoy!

To Show Recycle Bin Icon on Desktop, Do same steps but instead of Enable select Not Configured.

2) This step is somewhat risky, if you done this incorrectly you may have to Reinstall
your Operating System. This Blog's Author will not be liable if any damage occurs.
Do it on your own risk or choose the first way.

NOTE : - Backup your Registry File before Proceeding.

Copy the following code into notepad and save it as recycle.reg.

Windows Registry Editor Version 5.00
[HKEY_LOCAL_MACHINE\SOFTWARE\Microsoft\Windows\CurrentVersion\Explorer\
Advanced\Folder\RecycleBinOnDesktop]
"RegPath"="Software\\Microsoft\\Windows\\CurrentVersion\\Explorer\\
HideDesktopIcons\\NewStartPanel"
"Text"="Show Recycle-Bin Icon on the Desktop"
"Type"="checkbox"
"ValueName"="{645FF040-5081-101B-9F08-00AA002F954E}"
"CheckedValue"=dword:00000000
"UncheckedValue"=dword:00000001
"DefaultValue"=dword:00000000
"HKeyRoot"=dword:80000001

  • Double click on the file, click YES, click OK.
  • A new option will be added in the Folder Option.
  • Goto My Computer, then Tools Menu, then Folder Option
  • Select View tab, find Show Recycle-Bin Icon on the Desktop option select it.
  • Press OK, Enjoy!

A Trick to Protect Your Email Address From Spam Robots

Spam Robots are continuously Crawling the Internet through search engines in search of email addresses. They find email addresses with the help of @ symbol because email always contain the symbol and gather as many as possible.

You can't be spam free if you are publishing or displaying your email address anywhere on the web. But, by the help of the following trick you can display your email address on any website or blog.

Generally we display mailto:you@yourdomain.com in email link

Instead of this just write

<a href="mailto:you&#64;yourdomain.com">Email Me</a>

The @ code represents @ symbol. But Spam Robots can't read it.

Software Review: Backup Platinum

backupThe most important and (I think) most neglected part of computing is Backing up Data. The main purpose of Data Backup is to restore your computer to an operational state and to secure your important data like your Business Documents, email addresses of your friends and families, your favorite images or videos, your to-do list etc.

Organizing this storage space and managing the backup process is a complicated undertaking.

Backup Platinum does all these things for you. Backup Platinum is an easy-to-use yet powerful backup program designed for Microsoft Windows. This utility uses "Wizard" approach which let user do his process easily.

It is a powerful tool that provides professional quality backup of your data to a local drive, LAN, CD writing device or a remote FTP server and even you can backup to DVD. This utility is designed for Microsoft Windows 95/98/ME/NT/2000/XP/2003 ( Windows Vista?).

You can set schedule for the backup process, this is a automated process. You can compress your data, so you will save some disk space. If you want to secure your data, it provides you a strong 128-bit Blowfish encryption.

It can be used together with ZIP compression or independently from it. In all cases nobody will access your stored data without your secret password. A built-in CD/DVD engine allows you to erase a rewritable disk before burning and automatically split large backups into several parts by using disk spanning.


backup
Main features of Backup Platinum
  • Full CD-RW and DVD support with disc spanning
  • Backup and synchronize with LAN and FTP
  • Integrated ZIP compression
  • 128-bit encryption with Blowfish
  • Flexible and powerful scheduler
  • Can run in service mode on Windows NT/2000/XP/2003
  • It is a small program around 3MB

To keep your data safe and secure I highly recommend you for Backup Platinum. This utility cost you $67, if you want a trial version of 30 days to test it, Download Here.

Recent Comments and Recent Posts Widgets

post and commentOne way to let readers locate the recent posts is to have an “Archive” page element in the sidebar. It sorts the articles by dates. However, it is not ideal for those who do not have active Blogs or any new post in the last couple of months. These people may want to display the links to recent posts, regardless of the dates. Even if you have an active Blog, regular visitors may want to view your recent posts only, and a link widget showcasing these recent post links would be appreciated.

Adding a Recent Comments widget into your sidebar is a way of acknowledging the readers' feedback and giving their comments a prominent place in the main page of your Blog. It also makes it easier for them to check for replies to their questions and for other readers to follow up on topics which they may find interesting. This widget is especially useful if you have numerous comments to your Blog posts. As part of our writeup, we shall also explain how you can remove the “nofollow” tag in the Comments section of the template so as to allow the links in these comments to be visited by search engine spiders.
Ok. Now we add 2 widgets for your blog more pro !!!

Add Recent Posts:
Template -> Page Elements -> Add a Page Element -> HLMT/Javascript

<script src="http://taolaga.googlepages.com/blogger-widget.js"></script><script>var
numposts = 10; var showpostdate = false; var
showpostsummary = false; var numchars = 100; </script> <h2>RECENT POSTS</h2>
<script src="http://net-soft.blogspot.com/feeds/posts/default?orderby=published&amp;alt=json-in-script&amp;callback=rp"></script>

Add Recent Comments:
Template -> Page Elements -> Add a Page Element -> HLMT/Javascript

<script src="http://taolaga.googlepages.com/blogger-widget.js"></script><script>var
numposts = 10; var showpostdate = false; var
showpostsummary = false; var numchars = 100; </script> <h2>RECENT COMMENTS</h2>
<script src="http://net-soft.blogspot.com/feeds/comments/default?orderby=published&amp;alt=json-in-script&amp;callback=rp"></script>

Note:
Change the portion (in red) to the URL of your own blog.
numposts = 10: number of post you select display

Add Favicon icon to Blogger URL

Add Favicon iconHave you wondered how these little icons appear next to the web addresses, like the one you see above? When you visit the sites or bookmark them, these icons will make these URLs stand out. These are “Favicons” or “Favorite Icons”.

You would first need to have an icon which you would like to use, bearing the extension .ico format. If you search your hard disk, you might find some icons which are generic. I would suggest that you create one to represent your own unique identity. There are quite a number of free icon editor software which you can download from the net.

Go back to your Blogger dashboard and under the Template tab, go to “Edit HTML”. Near the top you will see a line like this:-

<title><data:blog.pageTitle/></title>

Copy and insert the following code below the line:-

<link href='URL of your icon file' rel='shortcut
icon' type='image/vnd.microsoft.icon'/>

You can use this code for other image typing:

If you have a PNG format image, the link to insert is:

<link href='URL of your icon file' rel='shortcut
icon' type='image/png'/>

If it is a GIF format image, the link is:

<link href='URL of your icon file' rel='shortcut
icon' type='image/gif'/>

Your change:
URL of your icon file by your image url.

Add an icon feed labels Blogger

feed icon Previously, we had talked about how to get the address of the feed each label individually in a blog Blogger, and now we are going to give it a practical use to add an icon to feed each one.

To add this icon, the first is to make sure and take the blog a widget label (labels), but this is the case, add from the panel of page elements of blogging. Having done so, as you can change the code widget:

1. Go to the "template", then the "HTML editing" and activates the button "Expand Widget Templates" (important).
2. There seeks the following code:

<span dir='ltr'>(<data:label.count/>)</span>

3. Just after pasting the following code corresponding to the icon and the link:

<a expr:href='data:blog.homepageUrl +
"feeds/posts/default/-/" + data:label.name'><img
src='https://blogger.googleusercontent.com/img/b/R29vZ2xl/AVvXsEgklLgLBFVisH0XclWqfKJbFev4f2wfOEtuX_ZpxkOmr5QdaW25c5QbaWtV6mbNxqK-QV_GWy5lm2F07z3Qlhj7ZutQMXfS9X3kBdhUPgLmr7kJbne2yWOhOciDIpGF3nQuBj-jTlmC2hA/s1600/SynIco.png'/></a>

In this code it is possible to change the address on the label "img" to establish the icon of our preference.
4. Save and see !!!

Put Your Social Bookmarking Icons

bookmarkSocial bookmarking is a popular way for users to share their personal bookmarks of useful sites with other users. Since most of the bookmarks are classified by topics, tags or categories, people around the world with interests similar to the user can easily locate these sites by viewing their online bookmarks.

Just over the last couple of years, this concept has caught on with so many users that social bookmarking sites are now very popular and highly ranked by search engines. We shall discuss and list these sites in a separate article. For now, we want to provide you a code so that you can have something to work with.

Add bookmark code into your blog:

1.
AddThis

AddThis now offers a beautiful alternative to social bookmarking icons or those 16x16 pixel images that clutter the footer of almost every blog post on the web.

With AddThis, you can easily put links to all popular social bookmarking websites in a two-column drop down that appears only when someone hovers the mouse over the Bookmark button - the icons and links stay hidden or invisible otherwise.

If a visitor cannot find his/her favorite social bookmarking site in the AddThis menu, they can click the "More.." link access all other other social bookmarking services. Very cool!

Just add the following code to your blog template.

<!-- AddThis Bookmark Button BEGIN -->
<script type="text/javascript">
addthis_url = location.href;
addthis_title = document.title;
</script><script type="text/javascript" src="http://s7.addthis.com/js/addthis_widget.php?v=12"
></script>
<!-- AddThis Bookmark Button END -->

Though you can grab the AddThis button for your blog without registration, I seriously recommend getting a free account as you get access to invaluable stats.

2. Social bookmark text links

Now we are going to see like putting them:

1.Go to Template -> Edit HTML -> Tick into Expand Widget Templates

2. We looked for the following code:

<p class='post-footer-line post-footer-line-3'/>

3. That line with the following code replaces:

<p class='post-footer-line post-footer-line-3'>

<div class='rsociales'>

Share this post with:

<ul>

<li><a expr:href='"http://www.technorati.com/faves?add=" + data:post.url + "&amp;title="
+ data:post.title' target='_blank'><img alt='Agregar a Technorati' class='rsociales-sobre'
src='https://blogger.googleusercontent.com/img/b/R29vZ2xl/AVvXsEiCWvYQAl5YDOTfMfaMpj7zfNi8f534kPYO1pD4Gl2veACa9LdEvyCPy-1hD2Vzu8J9r1LI6sSM6jOmqBwJc2nJhXwCOtaQ132R9A1UGVNuderFjuH06oxId98Yp6eiFJwgPRMacTe4ok8/s1600/technorati.gif'/></a></li>

<li><a expr:href='"http://del.icio.us/post?url=" + data:post.url + "&amp;title="
+ data:post.title' target='_blank'><img alt='Agregar a Del.icio.us' class='rsociales-sobre'
src='https://blogger.googleusercontent.com/img/b/R29vZ2xl/AVvXsEjePfA8e3kvdXprxIFjHLtpUJ3zvmWxrJpuD3XO3kWuC6O-BgwkR2vrrHN4mQgd1td5AZmO7kVTrGUXBBp-O7RDanzXEBMlRzEEQXjfQIQVQR_M_rGpqnfV4qgNcp1G6sS2OWqyldzqqpU/s1600/delicious.gif'/></a></li>

<li><a expr:href='"http://digg.com/submit?phase=2&amp;amp;url=" + data:post.url
+ "&amp;title=" + data:post.title' target='_blank'><img alt='Agregar a DiggIt!'
class='rsociales-sobre' src='https://blogger.googleusercontent.com/img/b/R29vZ2xl/AVvXsEj6Ept1NbRZE-sICZhgUiMbYuaPvH3hNCakIqL-FIxqBfPvzT1n4a_YXzVmKdcw8tjjXvnNBGRiWkfMGHUlqxvGFP3ZBk6-Q5cMPuZItvVXl3PWQsgqDL1QODVYVB02h7vgYkNE6_tfbKw/s1600/digg.png'/></a></li>

<li><a expr:href='"http://myweb2.search.yahoo.com/myresults/bookmarklet?u=" +
data:post.url + "&amp;title=" + data:post.title' target='_blank'><img alt='Agregar
a Yahoo!' class='rsociales-sobre' src='https://blogger.googleusercontent.com/img/b/R29vZ2xl/AVvXsEiIF85o1VPeDsNfqKFhkE_-oFukqStwDe0fnk-LUIeKOAqwqdXqnsTQHsLkH6wWMp6lCAXe47BMAS-PGCaqrgvaxlyNINPFsJ2HWARVZ06FfFDp3nabkrrLYIG7U0P5lvbYh40MeyW4nPw/s1600/yahoo.png'/></a></li>

<li><a expr:href='"http://www.google.com/bookmarks/mark?op=edit&amp;output=popup&amp;bkmk="
+ data:post.url + "&amp;title=" + data:post.title' target='_blank'><img alt='Agregar
a Google' class='rsociales-sobre' src='https://blogger.googleusercontent.com/img/b/R29vZ2xl/AVvXsEjDcjGIeAsGySIoMph-rmi1KKb_AhLkuW6Mtr6H-qrjEaIug3OncGPGagzG01MBJBRDvc0hjY6-M_ucfJ28kvecJSzjf7eMerr60rYi_PWjR91MjeIXfDk59-lvWnfh0-FXwritqK0akII/s1600/google.gif'/></a></li>

<li><a expr:href='"http://meneame.net/submit.php?url=" + data:post.url + "&amp;title="
+ data:post.title' target='_blank'><img alt='Agregar a Meneame' class='rsociales-sobre'
src='https://blogger.googleusercontent.com/img/b/R29vZ2xl/AVvXsEiNIfj2f6cu2JCtWUjh6mEB_oNxGw0I7YO24FGfQQ_r1fA8xyuSdWjJkDCr2-_0y80aFgdM2laOW8xlW_tW3152JKpJEmLS024rwIsdD8UWF69gkF2wY_xeNdSelatzwoTusRxYFrOE_c4/s1600/meneame.png'/></a></li>

<li><a expr:href='"http://www.furl.net/storeIt.jsp?u=" + data:post.url + "&amp;title="
+ data:post.title' target='_blank'><img alt='Agregar a Furl' class='rsociales-sobre'
src='https://blogger.googleusercontent.com/img/b/R29vZ2xl/AVvXsEg1eAKsKX2qlEQx91jVSm-v6qsjvr6jqgbwJbBy6Q5g030VqRyqLqGCmPhhPp9V-WGMQz-3CAdWI0LKKVMg5Q4VS-9LbYxHAirZNqh3tkhJEm7t0zEadpitgj1AMW-l5yFyrs13rT_ye20/s1600/furl.png'/></a></li>

<li><a expr:href='"http://reddit.com/submit?url=" + data:post.url + "&amp;title="
+ data:post.title' target='_blank'><img alt='Agregar a Reddit' class='rsociales-sobre'
src='https://blogger.googleusercontent.com/img/b/R29vZ2xl/AVvXsEikTDgsPemu4frlRCI_Bkl7-VYGaUOL6AoBqbnBTdJxlLSatzK8_OucpEQ7vQ6JV_P4yrVS33FMGwfO9PY3DSYcFELjJk2pRwefJw7VpZ-BlewUx9RW5PcW0oV-LvjX2MuhfildxHM0y_4/s1600/reddit.gif
'/></a></li>

<li><a expr:href='"http://ma.gnolia.com/beta/bookmarklet/add?url=" +
data:post.url + "&amp;title=" + data:post.title' target='_blank'><img alt='Agregar
a Magnolia' class='rsociales-sobre' src='https://blogger.googleusercontent.com/img/b/R29vZ2xl/AVvXsEiHUaq89_wp4qMQmPBvcWLeh9WHB9hswIMnpHnZ8TMtuavfy1xPCR_qGvCLAlkflAAkc8JI3gj-Gl_rgCM8tC9KyWSY3230Va78fMq0aE0PheDzCj34XYw-UO4FzLKe0roIWt817Th3e_I/s1600/magnolia.gif'/></a></li>

<li><a expr:href='"http://www.blinklist.com/index.php?Action=Blink/addblink.php&amp;Description=&amp;Url="
+ data:post.url + "&amp;title=" + data:post.title' target='_blank'><img alt='Agregar
a Blinklist' class='rsociales-sobre' src='https://blogger.googleusercontent.com/img/b/R29vZ2xl/AVvXsEi4GD8vlFjC3LA9a9PeTnj2ERXFsUQMB1RymsFUmVAkN4uLFuBeomIZW02LJ3IVZFszSYTY3C4KMkbsnA-NVt3-MiSVZ5nC424JGnuGdnPQbWty-JeJeEfdXUFOiBu01FnhWULboEw-aQM/s1600/blinklists.gif'/></a></li>

<li><a expr:href='"http://blogmarks.net/my/new.php?mini=1&amp;simple=1&amp;url="
+ data:post.url + "&amp;title=" + data:post.title' target='_blank'><img alt='Agregar
a Blogmarks' class='rsociales-sobre' src='https://blogger.googleusercontent.com/img/b/R29vZ2xl/AVvXsEgFrDBHLCLQjmGoE3wmA0VonGKR7-z-4Z4D5qlXIgO1xJUm4l6dx4EGrRfnvVnelfC3WgWz6smceyo3INQh-KMUDdiN4aObWN3BXVEgn87aF7bslbAJMOaCMG7igB3C6c1f-KufPSrvtE4/s1600/blogmarks.gif'/></a></li>

</ul>

</div>

</p>

4. Now it looks for the code:

]]></b:skin>

And right above it sticks the following thing:

.rsociales ul {
display:inline;
margin:0pt !important;
padding:0pt !important;
}
.rsociales li {
background:transparent none repeat scroll 0%;
display:inline;
list-style-type:none;
margin:0pt;
padding:2px;
}
.rsociales img {
border:0pt none;
float:none;
margin:0pt;
padding:0pt;
}
.rsociales-sobre {
opacity:0.4;
}
.rsociales-sobre:hover {
opacity:1;
}

Add Ratings To Your Blog Posts

Blogs that are on Blogger, WordPress or TypePad can now add the wonderful outbrain star ratings widget to their blog posts.

This ratings widget has been under a closed beta for some time but they finally made a public release today.

ratingsIt's light, requires no registration and very intuitive - visitors can hover the mouse over the five stars and click any of them to rate your current blog post.

Even if you have a regular website that's not a blog, this ratings widget can be installed on your site as well.

You need such a rating widget to get feedback from all those reader who are subscribed to your blog aren't contributing to the discussion because they are probably too lazy to write a comment.

Give them a system like this ratings widget that requires no effort and they'll be happy to say if enjoyed or disliked reading your blog post.

Get Ratings Widget here. Developer Blog is here. If you are using Windows Live Writer to insert ratings in your blog posts

Add google translate into blogspot

google translateThis tutorial explains how you can add a script to allow readers to view your English site in other foreign languages. As you can see on the right of this page, a reader needs only to click the relevant country flag to read this site contents in his preferred language.

English is not the most popular language in the world. In fact, according to many reports, the Chinese language (Mandarin) is certainly the most widely spoken language. In the internet community, the other popular language platforms are arguably Spanish, Russian, Arabic, Portuguese, Malay, Italian, French, Japanese, and Korean.

Translation from English to other languages

If you have a blog written in English, it therefore makes much sense to be able to reach out to the non-English speaking population as well. There are several online translation tools, the popular free tools being AltaVista's Babel Fish translation and Google's Language Translator. WorldLingo is no longer a recommended tool, as the website translator has a translation limit of 500 words, beyond which you have to pay a monthly fee for their service.

For this site, I have used the Google Language Translator. Google is able to translate English website contents into Arabic, Chinese, French, German, Italian, Japanese, Korean, Portuguese, Russian, and Spanish. The JavaScript used here can be applied to most of the blogging sites like Blogspot, Typepad and Wordpress. Copy the following script and paste it at the part of the template where you want your language translator to appear.


<form action="http://www.google.com/translate"
>

<script language="javascript"
type="text/javascript">

<!--

document.write ("<input name=u value="+location.href+"
type=hidden>")

// -->

</script>

<noscript><input name="u" value="http://net-soft.blogspot.com/"
type="hidden" /></noscript>

<input name="hl" value="en" type="hidden">

<input name="ie" value="UTF8"
type="hidden">

<input name="langpair" value=""
type="hidden">

<input name="langpair" value="en|ar"
title="Arabic" src="http://photos1.blogger.com/x/blogger2/6075/564571464515337/1600/z/358406/gse_multipart12399.png"
height="20" type="image" width="30" onclick="this.form.langpair.value=this.value">

<input name="langpair" value="en|zh-CN"
title="&#20013;文(简体)/Chinese (Simplified)" src="http://photos1.blogger.com/x/blogger2/6075/564571464515337/1600/z/546049/gse_multipart12397.png"
height="20" type="image" width="30" onclick="this.form.langpair.value=this.value">

<input name="langpair" value="en|zh-TW"
title="&#20013;文(繁体)/Chinese (Traditional)" src="http://photos1.blogger.com/x/blogger2/6075/564571464515337/1600/z/208681/gse_multipart12398.png"
height="20" type="image" width="30" onclick="this.form.langpair.value=this.value">

<input name="langpair" value="en|fr"
title="Fran&#231;ais/French" src="http://photos1.blogger.com/x/blogger2/6075/564571464515337/1600/z/327620/gse_multipart12413.png"
height="20" type="image" width="30" onclick="this.form.langpair.value=this.value">

<input name="langpair" value="en|de"
title="Deutsch/German" src="http://photos1.blogger.com/x/blogger2/6075/564571464515337/1600/z/734899/gse_multipart12400.png"
height="20" type="image" width="30" onclick="this.form.langpair.value=this.value">

<input name="langpair" value="en|it"
title="Italiano/Italian" src="http://photos1.blogger.com/x/blogger2/6075/564571464515337/1600/z/306145/gse_multipart12401.png"
height="20" type="image" width="30" onclick="this.form.langpair.value=this.value">

<input name="langpair" value="en|ja"
title="&#26085;本語/Japanese" src="http://photos1.blogger.com/x/blogger2/6075/564571464515337/1600/z/443122/gse_multipart12402.png"
height="20" type="image" width="30" onclick="this.form.langpair.value=this.value">

<input name="langpair" value="en|ko"
title="&#54620;국어/Korean" src="http://photos1.blogger.com/x/blogger2/6075/564571464515337/1600/z/581031/gse_multipart12403.png"
height="20" type="image" width="30" onclick="this.form.langpair.value=this.value">

<input name="langpair" value="en|pt"
title="Portugu&#234;s/Portuguese" src="http://photos1.blogger.com/x/blogger2/6075/564571464515337/1600/z/670301/gse_multipart12404.png"
height="20" type="image" width="30" onclick="this.form.langpair.value=this.value">

<input name="langpair" value="en|ru"
title="&#1056;усский/Russian" src="http://photos1.blogger.com/x/blogger2/6075/564571464515337/1600/z/111692/gse_multipart12405.png"
height="20" type="image" width="30" onclick="this.form.langpair.value=this.value">

<input name="langpair" value="en|es"
title="Espa&#241;ol/Spanish" src=
"http://photos1.blogger.com/x/blogger2/6075/564571464515337/1600/z/998398/gse_multipart12407.png"
height="20" type="image" width="30" onclick="this.form.langpair.value=this.value">

</form>

Points to note:-

1. For those using Blogspot, once you have logged into your Dashboard, go to Template-> Page Elements. Add a “Page Element” and select “HTML/JavaScript”.

2. Copy the above JavaScript. Under the “value” (in red), you will see the URL of this website. Please change that to the URL of your own website. Save and refresh the page.

3. If you want a slightly bigger flag, you can increase the width of the images, for example, from “30” to “36” and the height from “20” to “24”.

4. Should you come across a translation that doesn't look right, you can always suggest to Google a better translation to help them improve their translation quality.

Hide or Remove Navbar in Blogger

The Blogger or Blogspot Navbar is a default feature that appears at the top of every Blogger powered blog. It is a useful navigation tool which allows readers to search the blog for targeted content, mark the blog as objectionable, and randomly view other member blogs.
navbarThe Navbar can be disabled for users who publish contents via FTP, but it will appear on all freely hosted BlogSpot blogs. While the feature is undeniably useful, some people find that its position at the top of the page looks obtrusive even with a choice of 4 colors. Some therefore pick a template with a black background to blend well with a black navigation bar. There are also parents and educators who find the 'view random blogs' feature inappropriate, as their children may inadvertently view objectionable blogs.

Nevertheless, this article is not a discussion on the merits or demerits of a Navbar. That is for you to decide. Here, I am assuming that you have made a conscious decision to hide or remove the Navbar. Having so decided, this is the guide on how you can do it.

With Classic Template:

Technique One: Insert (copy, paste) the following CSS code in your Blogger Template to disable the Blogger Navbar

<style type="text/css">
#b-navbar {
height:0px;
visibility:hidden;
display:none
}
</style>
Technique Two: This is another simple way to remove the Blogger Navbar but it will not form valid HTML. Replace your &ltbody> tag with the following code and hide will hide the Blogger navbar.
<noscript><body></noscript>
Technique Three: Similar to technique two for hiding the blogger navbar but doesn't form valid HTML. Replace your &ltbody> tag with the following code and hide will hide the Blogger navbar.

<noembed><body></noembed>
I use the first technique for this weblog as it results in well-formed HTML. Remember GoogleBot hates pages that are not constructed with well-formed HTML. But hiding the blogger navbar gives rise to another problem. You might notice some empty space in your webpages between the top edge of the browser window and your blog content. We will again employ a simple CSS tweak to remove the gap at the top.
body
{
margin-top:0px;
}
If this doesn't remove the gap created with Blogger Navbar, try the following CSS hack
body
{
margin-top:0px;
position: relative;
top: -50px;
}
New Blogger Template ( Blogger Beta)

Log into your dashboard, go to Template -> Edit HTML. Scroll to anywhere on the template and insert the following CSS style definition in red within the head section.

#navbar-iframe {
display: none;
}
</head>

or:

#navbar-iframe {
height: 0px;
}

or:

#navbar-iframe {
visibility: hidden;
}

Add Digg button to Blogger or Blogspot

add digg buttonThis is my old tutorial that I have written for my old ajaxcold site that
explains how you can add a Digg vote button for each post into the new blogger template.

Open your blogger template, expand the widgets and find this code's line:

and add on top to this code:

<!-- DIGG -->
<div style='float:right;margin-left:10px;'>
<script type='text/javascript'>
digg_url = '<data:post.url/>';
</script>
<script src='http://digg.com/tools/diggthis.js' type='text/javascript'/>
</div>
<data:post.body/>

If you want to have the button at the top left corner of your post, change the alignment.

<div style='float:left; margin-right:10px;'>
<script type='text/javascript'>
digg_url=&quot;<data:post.url/>&quot;;
</script>
<script src='http://digg.com/tools/diggthis.js' type='text/javascript'/>
</div>
<p><data:post.body/></p>

Download free, fast, compact and innovative graphic viewer for Windows

IrfanViewIrfanView is software that can be awarded as anything more than a graphic viewer, because its features claims that. There are a lot of unique recognitions for IrfanView:

  • IrfanView was the first Windows graphic viewer WORLDWIDE with Multiple (animated) GIF support.
  • IrfanView is one of the first graphic viewers WORLDWIDE with Multipage TIF support.
  • And the first graphic viewer WORLDWIDE with Multiple ICO support.
IrfanView
Its features outweigh its credits, those cool features are:
  • Most of all graphic format supports.
  • Audio and video content player
  • Painting option on images.
  • Slideshow supports, even on recursive folders.
  • Shell extension for command line usage.
  • Batch conversion utility.
  • Creating favicon for websites.
  • GIF animation support.
  • Support of Image effects.
  • Graphic formats interconversion utility.
All these bundle of features comes with no cost, absolutely free.
Download your free copy of IrfanView graphic viewer software.

Find duplicate MP3, Ogg, WMA and FLAC audio files on your computer

Find Mp3When you have a huge collection of song of different Genre, Albums, artists etc. its always happens to have duplicate audio files in your collection. If duplicate audio files are increased to a higher extend, it will eat up a major chunk of your hard-drive.

In order to find out the duplicate audio files, EFSoftware, Germany, has came up with a solution. This product is named EF Duplicate MP3 Finder. The EF Duplicate MP3 Finder can search in multiple drives or multiple paths for duplicates and recursively in sub-folders. Folders can be excluded from the lookup and search results can be localized with the help of filters.

Once the EF Duplicate MP3 Finder finished with the search, it will display the duplicate audio files in a in different colors to distinguish easily. The colored representation makes a simple and intuitive recognizing possible among similar files. The EF Duplicate MP3 Finder supports the deletion, copying, moving or renaming duplicate audio files in the search result. Even, users can save or export the search results for future reference.

Download EF Duplicate MP3 Finder

Integrate Facebook and Firefox with Facebook Toolbar

Fakebook toolbarFacebook is one of the hottest Social Networking website on the internet. Facebook became much more famous and admired by many people after the release of their Facebook Platform. The Platform provides an environment for interested Facebook users to develop their on web applications in Facebook, and there by extending the functionalities of Facebook.

Now, Dorian Patterson has come up with a toolbar for Firefox web browser, to help Facebook users. The new Facebook Firefox toolbar can be used to search Facebook, get notified upon new pokies, get alert on new friend requests and message alerts. Also this toolbar helps to get connected with your Facebook friends and share contents with them.

Fakebook toolbarSounds so cool?. Download the Facebook Toolbar for Firefox browser.

You must make free upgrade to Windows XP SP3

windows xp3Microsoft has released the Service Pack 3 of Windows XP recently. The release was not a fresh release of Windows XP, but Microsoft put forward the idea of baselining the existing lower versions of Windows XP to SP3. Service Pack 3 of Windows XP is not coming with any GUI changes, but Microsoft team gave more emphasis on security updates and operating system patches. This was a deviation from the releases like, Windows XP SP1 and SP2. Obviously, you cannot expect Microsoft to release Windows XP SP3 with GUI's similar to its latest operating system Windows Vista.

windows xp3
More over, Microsoft is giving away the Standalone Windows XP SP3 upgradation for free and even without Genuine check. You can very well download the setup from Microsoft website and do the upgradation even if you are using a pirated copy of Windows XP.

I would personally suggest you to make the upgrade, as it would make your computer much more safer, better and faster machine. Only thing that was missing from Windows XP SP3, as I expected is, Internet Explorer 7. But you can compensate it by directly installing IE7 by downloading from Microsoft website, even without Genuine check.

Download Windows XP SP3 from Microsoft for free.

How to Create a Blog Using Blogger

bloggerA Blogger.com blog is simple to use and easy to maintain. It's no wonder Blogger is the most popular blog platform available today. If you're interested in beginning a blog using Blogger, This brief primer will take you through all of the necessary steps. Soon, you'll be blogging like pro!


Step 1

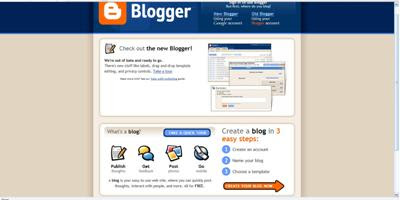
Begin by visiting the Blogger.com homepage and clicking on the orange arrow that says "Create Your Blog Now".

How to Create a Blog Using Blogger
Step2: Enter Your Information

Enter your email address, password, the name or nickname you would like displayed on your blog and security information. Click on the box to accept the Terms of Service.

How to Create a Blog Using BloggerStep 3: Give Your Blog a Name

Name your blog by entering the blog's title and address. For most bloggers, the title and address are the same thing. Have second and third choices available for each, however. Your first choice might already be taken.

How to Create a Blog Using BloggerStep 4 : Templates

Choose a template from the many available designs.

How to Create a Blog Using Blogger
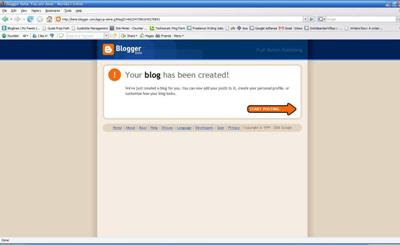
Step5:Start Posting

You are now ready to post.

How to Create a Blog Using Blogger
Step 6 :It's Time to Blog!

Add a title, enter text and click "publish".

How to Create a Blog Using Blogger

Saturday, January 19, 2008

tet

Test ne

Day moi goi la test

Friday, January 18, 2008

Download IE7 for Windows XP without Genuine Check

Its a great news for Windows XP Service Pack 2 users, who are not directly connected to internet and those who are not using Genuine Windows XP SP2 in their pc. Microsoft is providing Internet Explorer 7 for free download without Microsoft Genuine Software Check.

Download IE7Earlier Microsoft allowed the download of IE7 to only Windows XP SP2 users who are passing Microsoft Genuine Software check. And more over, the earlier IE7 setup was not redistributable. Later Mr. Gates might have realized Firefox effect.

End users always welcome competition among peer products, as they can enjoy the better fruit.
Download Internet Explorer 7 for Windows XP SP2.

Create and Manage Personal Digital Library with Adobe Digital Editions

When you have a good collection of ebooks and tutorials, you might dream of having a personal ebook library software to manage all your ebooks. And, adobe is here to help you with their software named, Adobe Digital Editions. Using Adobe Digital Editions you can organize all your ebooks in one place. Its as simple as organizing your music files with Winamp and iTunes.

Adobe downloadAdobe Digital Editions is built as a light weight Rich Internet Application (RIA), also this works both online and offline for reading pdfs and XHTML based contents. You don't have to open Adobe Acrobat Reader for reading your pdf files added in Adobe Digital Editions, there is an inbuilt reader for doing that.

Adobe Digital Editions is a very small application, less than 3MB and very easy to install. You will also get access to free ebooks library from adobe, once you install Adobe Digital Editions.
Download Adobe Digital Editions for free

Tuesday, January 15, 2008

Free PDF to Word DOC Converter

I really haven’t gotten around checking new freeware for the past few months so oblige me as I sneak in a post or two. In all honesty, I could just go on and on featuring all sorts of freeware here but I usually go for the top-ranked ones. Call me prejudiced, but if it’s not in my PC, I rarely recommend it to people.

free pdf convertAnyway, I’m quite glad that someone has finally come up with a free PDF to Word converter. Commercial software asks for somwhere between $50 to $100 for this functionality but we just have to thank HelloPDF for creating Free PDF to Word Doc Converter.

A word of warning though, for a free converter, this is probably the best thing that you can get. It’s great for those straight up conversion like if the PDF document looks to have been created from a Word document and if it doesn’t include fancy formatting. I tried one that’s of that nature and it works like a charm.

Feed it something that has more fanciful layout like tables and whatnot and you might have a wee-bit of a problem. What’s nice about it is that it has a Uses Text-box option that tries to replicate layout by converting chunks of text from PDF to text-boxed paragraphs in Word. It can capture the layout quite well but editing might be a bitch.

But as far as I have experienced, this is a great tool to have in your archiving arsenal. I’m a PDF fan and I know the hassles of having to copy text from PDF and pasting them to Word. This converter works for me.

Download PDF to Word DOC Converter here.

Via Lifehacker

How to Automatically Login to Vista

So you’re the only one who uses your computer at home and it annoys you to wait for that login prompt where you have to enter the password to your user’s account. But wouldn’t it be nice if you could just readily fire up Windows and start using it right away. You can just press the power button and wait for the desktop to show. Here’s how you can stop Vista from asking for your password every time you start your PC.

windows tips

  • Click on Start (or press the Windows Key) and type netplwiz in the Start Search line. Press Enter
  • Acknowledge the User Account Control if it bugs you and it will.
  • Just at the top of the User Accounts window, you have there a check box marked “Users must enter a user name and password to use this computer,” if it’s checked, uncheck it.
  • Click OK.
  • If you’re the only user for the computer, Windows will automatically log you into your system the next time you start.

My desktop PC which is running on XP is set to this behavior. I’m running Vista on my laptop and as an extra security cushion, I’m not using this. But I assure you, this works.

Quickly Restart Firefox

A really quickie quick tip here. Probably it’s me just playing catch-up to all those great Firefox extensions that we’ve failed to feature just before Mozilla unleashes version 3 of our favorite browser.

Firefox tipsBasic functionality with this one and quite sadly a unitasker. But what a useful unitasker this is. Ever had to restart Firefox? That means closing the Firefox window and then clicking/double-clicking your shortcut to Firefox somewhere (and God-forbid deep in the Start Menu).
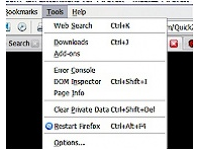
QuickRestart gives you the functionality of restarting Firefox in just one click. Installing this add-on gives you a few options on how to initiate the restart. You can go choose it in the menu, customize your toolbars to feature the restart button, and my favorite, just press the keyboard shortcut (Ctrl+Alt+R).

Download QuickRestart add-on here.

Undo Close Tab in Firefox quickly

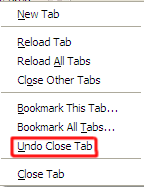
Firefox TipsI just found an interesting feature in Firefox 2. If you have an open tab, then close it, you can right-click the tabs and choose 'Undo Close Tab' and the banished tab will return.

Update:

Jim Priest, who turned me on to the Microsoft Update Reboot Fix points out that the following key combos work:
CTRL+T = new tab
CTRL+SHIFT+T = restore last closed tab

I've use CTRL+T countless times. It never dawned on me to try CTRL+SHIFT+T. Thanks again Jim!

Hide the Tab Bar in Firefox

Firefox brought us perhaps the real best thing since sliced bread - tabbed browsing. Now why the heck should you hide the precious thing? I’d have to admit that I used to think that I’d rather not browse the web at all if I have to go back to the days of IE6 and the tabless browsing world but hiding the tab bar has a few perks. Quite unimaginable? Not quite.

Firefox Tips
Hide Tab Bar is an add-on that gives you the option to hide your tab bar. Check the View menu and you’ll find out that Firefox doesn’t let you touch its precious appendage. The add-on gives you the hide function either via menu or keyboard shortcut.

So I digress with the point of hiding the tab bar. I tried it out and I’d have to say that it put a really big crimp on my browsing behavior. A test of will of sorts not to browse multiple sites at the same time. So what good did this do? It gave me focus on the tasks at hand. Much like using minimalist word processors, the limited functionality prevented me from pointless multitasking. So for those looking for an extra boost of productivity, try hiding your tab bar.

Why not just fire up the old tabless IE 6? No thanks.

Download Hide Tab Bar here.

Design by Free blogger template